Member-only story
Configure a secure custom domain in CloudFront
A five-minute walk through to demonstrate how to configure a custom domain in CloudFront, set up a certificate and configure Route 53.
CloudFront is Amazon’s low-latency Content Delivery Network (CDN). Using a CDN speeds up the distribution of content to visitors by serving content from edge locations that are closest to the user.
At the time of writing, Amazon has 216 Points of Presence (205 Edge Locations and 11 Regional Edge Caches) in 84 cities across 42 countries.
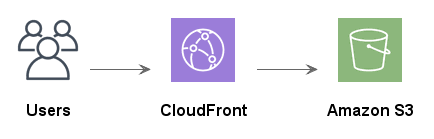
When you set up your CloudFront distribution, straight out of the box with the default settings you will have your own cloudfront.net domain.

(that is assuming you have already configured CloudFront in front of an S3 bucket that holds your static web content, but if not check out this guide on serving static content from S3 using CloudFront and come back)
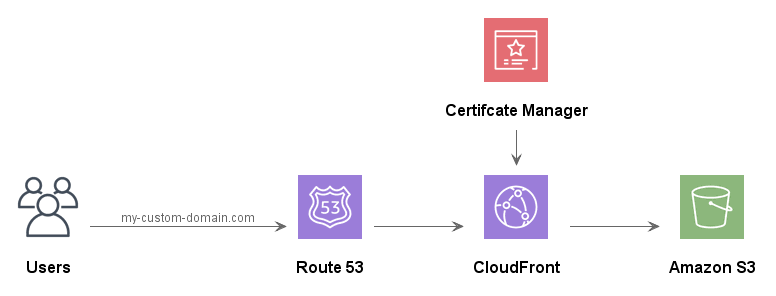
But what if you want to serve your content from my-custom-domain.com.
To use a custom domain requires a combination of Route 53 — Amazon’s highly available and scalable cloud DNS web service — and some additional configuration CloudFront. It doesn’t take too long to set up.
Before we start, I assume that you have your domain managed in Route 53; it doesn’t matter if you don’t, but this guide assumes you do.
There is an initial step to obtain an SSL Certificate within Certificate Manager. This allows you to serve your content over https and is a service provided by Amazon for free, and they’ll also take care of its renewal.
Within the Certificate Manager service, make sure you change your region to North Virginia; I cannot emphasize this one enough as it’s caught me out many a time. Then Request a Certificate.
